Thirsty Thursday: Gonna Party Like It's My Birthday!

Thursday, February 27, 2014

Someone’s birthday falls on Thirsty Thursday…and that someone is ME!!!! That means I have the honor of featuring my own drink here on this blog!

My loyal readers know that I love me some wine right now. Given that it is a Throwback Thursday, I thought I would stick to that theme and take a trip down memory lane, well what I can remember of it, and highlight some of my old favorite cocktails!

Oh you see that theme up there? Almost all of my birthday parties are at bars...well, one was Chuck E. Cheese, but they serve alcohol ; )


Pre-21

Yes. I drank before I was 21. Other than Zima, I wouldn’t say that I had a favorite drink during my underage years. It was basically whatever us kids could get our hands on. That involved Mad Dog (shout out to reader D), Keystone Ice and Peach Schnapps. Jell-o shots were also a must.

College

Freshman Year – Jungle Juice, Keystone and Milwaukee’s Best. Not favorite, but it was available. When my parents came to tailgate, we got the good stuff – Coors Light. When I snuck into bars (18 to party, 21 to drink…what, what!), I’d order Sex on the Beach…because that didn’t make it obvious that I wasn’t 21!

Sophomore Year – This is where the fake ID came in thanks to sometimes reader Margaux! For beer I’d go with Coors Light. Mixed drinks my go to was Captain & Coke.

Junior & Senior Years – Turning 21 meant legal trips to the bars. For $1 22oz mixed drinks at Levels, I went with Long Island Iced Teas. When I bought myself bottles of liquor, I went Barcardi O…until I imbibed in a bit too much – haven’t drank the stuff since. Beer – Coors Light and a little Bud Light here and there.

More bars...some things never change!

Post-College

2003 – dating Brady when I was living in Blacksburg, we would go to the local bowling alley and drink bottles of Bud Light in the shape of bowling pins. One of the only things I liked about Blacksburg.

Chicago Years

2005 – Moving to Chicago, I started experimenting with new cocktails. Chicago is where I discovered Effen Black Cherry. So for several years, I moved to Effen Black Cherry and Sprite.

Around the 2006 time, I started drinking white wine. Pinot grigio specifically. I’d say around 2009, I moved to Prosecco. In 2010, I discovered Prosecco with a splash of St. Germain. Shots of choice were red headed sluts and Patron. I also adopted a love of Bloody Marys during brunch!

Pittsburgh Years

In 2011, I blame sometimes reader Lindsay, I moved over to red wine. My favorite is cab and I LOVE Arnold Palmer. Recently I got into Dave Matthews Dreaming Tree and love that too! I also love me a Pimm’s Cup during the summer and also tend to sip on a gin cocktail. Shot of choice right now is Fireball.


I can’t wait to see what the future will bring for my alcohol pallet! 
Read More

Fashion Friday: Alex & Ani

Friday, February 21, 2014


Over the last year and especially around the holidays I saw Alex & Ani on a number of gift lists. I’ve seen this brand before and saved it into my “Gift” bookmark folder, but recently I’ve seen some people wearing these bracelets in person and they are super cute!

I started writing this three weeks and breaking news has come in before I could post…the Victoria Secret in Shadyside closed and it’s going to be….an Alex & Ani Store!

Not only are the bracelets cute, but they each have a special meaning.

According to the website, Alex & Ani create eco-friendly, positive energy products to enlighten the mind and empower the spirit. For example:

Khaki Healing Charm: Green symbolizes connected hearts and love’s power to heal.

Grapes: A symbol of fertility, grapes are associated with good luck, hospitality and pleasure.

Om: A sound resonating throughout the body into the soul.

Purple Velvet Spirituality Charm: Violet provides spiritual wisdom and a sense of oneness with the universe.

Tinsel Beaded Bangle: A reminder to join family and friends in joyful celebration.

Claddagh Charm: The Claddagh, which originated in Ireland, represents the virtues of love (the heart), loyalty (the crown) and friendship (the hands).

Some additional good ones!


Mermaid                                                                    


Read More

Reader Mailbox: Lunch Ideas

Wednesday, February 19, 2014

Former reader Lindsay writes…What are some fun lunch ideas.

The reason reader Lindsay asked me this question is because I told her what I eat for lunch: veggies. You see, on Sunday or Monday (depending on the cluster F the Whole Foods parking lot is), I buy a veggie tray from Whole Foods. It’s about $7 and you get broccoli, peppers (red, yellow and green), tomatoes, carrots, celery and cauliflower. Each morning I make a baggie of veggies for my lunch. I pair that with fruit, nuts, whole wheat wrap or some $2.50 Whole Foods hummus (best on the planet). In all, it’s a pretty healthy, filling lunch. Well filling for me. I can’t eat a big lunch at work or I’ll want to fall asleep at noon.


I’m not a health expert by ANY means, but sometimes I have some good ideas. So here are some other lunch ideas.

·         Quinoa: I went on a little kick of making a big bowl of quinoa early in the week and then adding in some veggie and a splash of soy sauce throughout the week. It’s good hot or cold and you can always add in shrimp or chicken. 

·         Veggie Wrap: Whole Foods has some awesome whole wheat wraps that are like $2.00 for like 6. Well, I take these a put a little hummus inside. Then, I’ll add some veggies…either one or all of the following: mushrooms, asparagus, cucumbers and a little feta here and there.

·         Salad: In Chicago salad was my go to lunch. A little lettuce, garbanzo beans, cucumbers, and peppers and you’ve got a pretty salad. I also keep salad dressing at work (if people don’t use it).

·         Tuna & Soup: Not together, but these are two staples that I always keep in my desk for those days when you forget lunch.

·         Veggie Burgers: I try and avoid processed foods when I can, but its rather difficult. One processed food that I don’t mind buying is veggie burgers. You can quickly zap them in the microwave and they are typically under 100 calories!

·         Tomato Salad: In the summer, I love to make a good cucumber and tomato salad with a bit of olive oil, basil and feta.

If you can’t tell, I’m like 60% vegetarian lol. I eat meat and fish during dinner, but by day I’m a veggie gal!

I couldn’t do this on my own, so I consulted the internets for some other recommendations…

·         Kale & Apple Salad
·         Veggie Pita Pocket
·         Southwest Pasta Salad – even a quick whole wheat pasta with a bit of cheese and Italian salad dressing would be great.  
·          Greek Salad
·         Chopped Lunch Salads
·          

Brady and I are now big fans of rotisserie chicken. For the two of us, we get at least four meals or more out of one $9 chicken!

Oh and you can never go wrong with PB&J!  
Read More

That time I made 20 centerpieces in 2 days...

Tuesday, February 18, 2014

I just ended my tenure in office as the Vice President of a professional organization in Pittsburgh. My last event was an awards ceremony in which I sat on the committee planning the event. I took over on décor and we planned on using balloons to add some sparkle to the event…until we had an amazing response to the event with more than 50 guests than we anticipated. We also saw the final floor plan the week of and balloons would block the view of those in the back of the room.

So four days before the event, we had to resort to another option with a limited budget. I ventured out to a craft store during a snow storm and I was able to turn around the following….


The event was held at PNC Park – home of the Pirates. Playing off of black and gold, I purchased gold faux flowers on way sale from Christmas (75 cents a bushel!). I then bought 10 taller circle vases and 10 lower square vases. They didn’t have 20 of one or the other.

Once I had the flowers and vases, I then grabbed 20 pieces of Styrofoam, black ribbon with a bit of sparkle and glue sticks. To add some more depth to the table, I bought black and gold sparkle poster board and regular black poster board and a circle hole punch to make confetti for the table.


Total Bill: $253.99 for 20 centerpieces!

To assemble the centerpieces, I cut up some petals and glued them on to the Styrofoam to cover the white base. I then trimmed the flowers with wire cutters and stuck them into the Styrofoam. Finally, I filled the vase with left over flowers just to continue to cover the bottom on the vase.


Did I LOVE them? No. But did they do the job? YES! I mean they worked for a four day turnaround! After making these for this price, I sorta wished I made my own centerpieces for my wedding! 


Read More

Craft-tastropy: Glitter Wine Bottles

Sunday, February 16, 2014

Not all of my craft projects go…um…well. Here’s one of them.

I’ve seen so many glittered wine bottles. I received a mini bubble bottle for Christmas AND a 12-pack of glitter from my mom, so I thought it was the perfect opportunity to try one of these sparkly crafts. I purchased some decoupage glue from Martha Stewart and tested my luck….


And it was almost all wrong.

I added the clear decoupage glue to the bottle and then started to sprinkle on the glitter. I used a very fine glitter and it actually took A LOT to cover up the bottle. I tried to even out some of the glitter with a brush and it just started clumping up on me. I could have added a few more layers of glitter, but I decided to stop before there was another glitter bomb all over our apartment.

Sooooo…


I’d probably recommend NOT doing this. Just tie a bow on the bottle. Or glue gems. Pass on this craft! 
Read More

Margarita Mama DIY Gift

Thursday, January 30, 2014

Did you believe me when I told you that I went on a major crafting binge? Well the hits are still coming!

I saw on a blog (forgive me, I read 652, so I don’t remember which one), these little margarita favor bags. Then, I was at Pat Catan’s craft store and saw these ADORABLE mini margarita glasses and this super cute bottle, so I decided to make this little favor!


You could totally use this as a gift for a friend that just needs a drink, a bridal shower, a fiesta/Cinco de Mayo favor or a bachelorette party.


What I Used To Make This:
·         Mini Bottle of Tequila
·         Mini Margarita Glass
·         Mini Bottle of Homemade Margarita Mix
·         Bag
·         DIY Bag Tag

You could totally buy a bigger margarita glass and fill it with all of these items. Some other things to include:
·         A lime
·         Salt
·         Philosophy margarita shower gel
·         Margarita nail polish
·         Margarita Jelly Beans
Read More

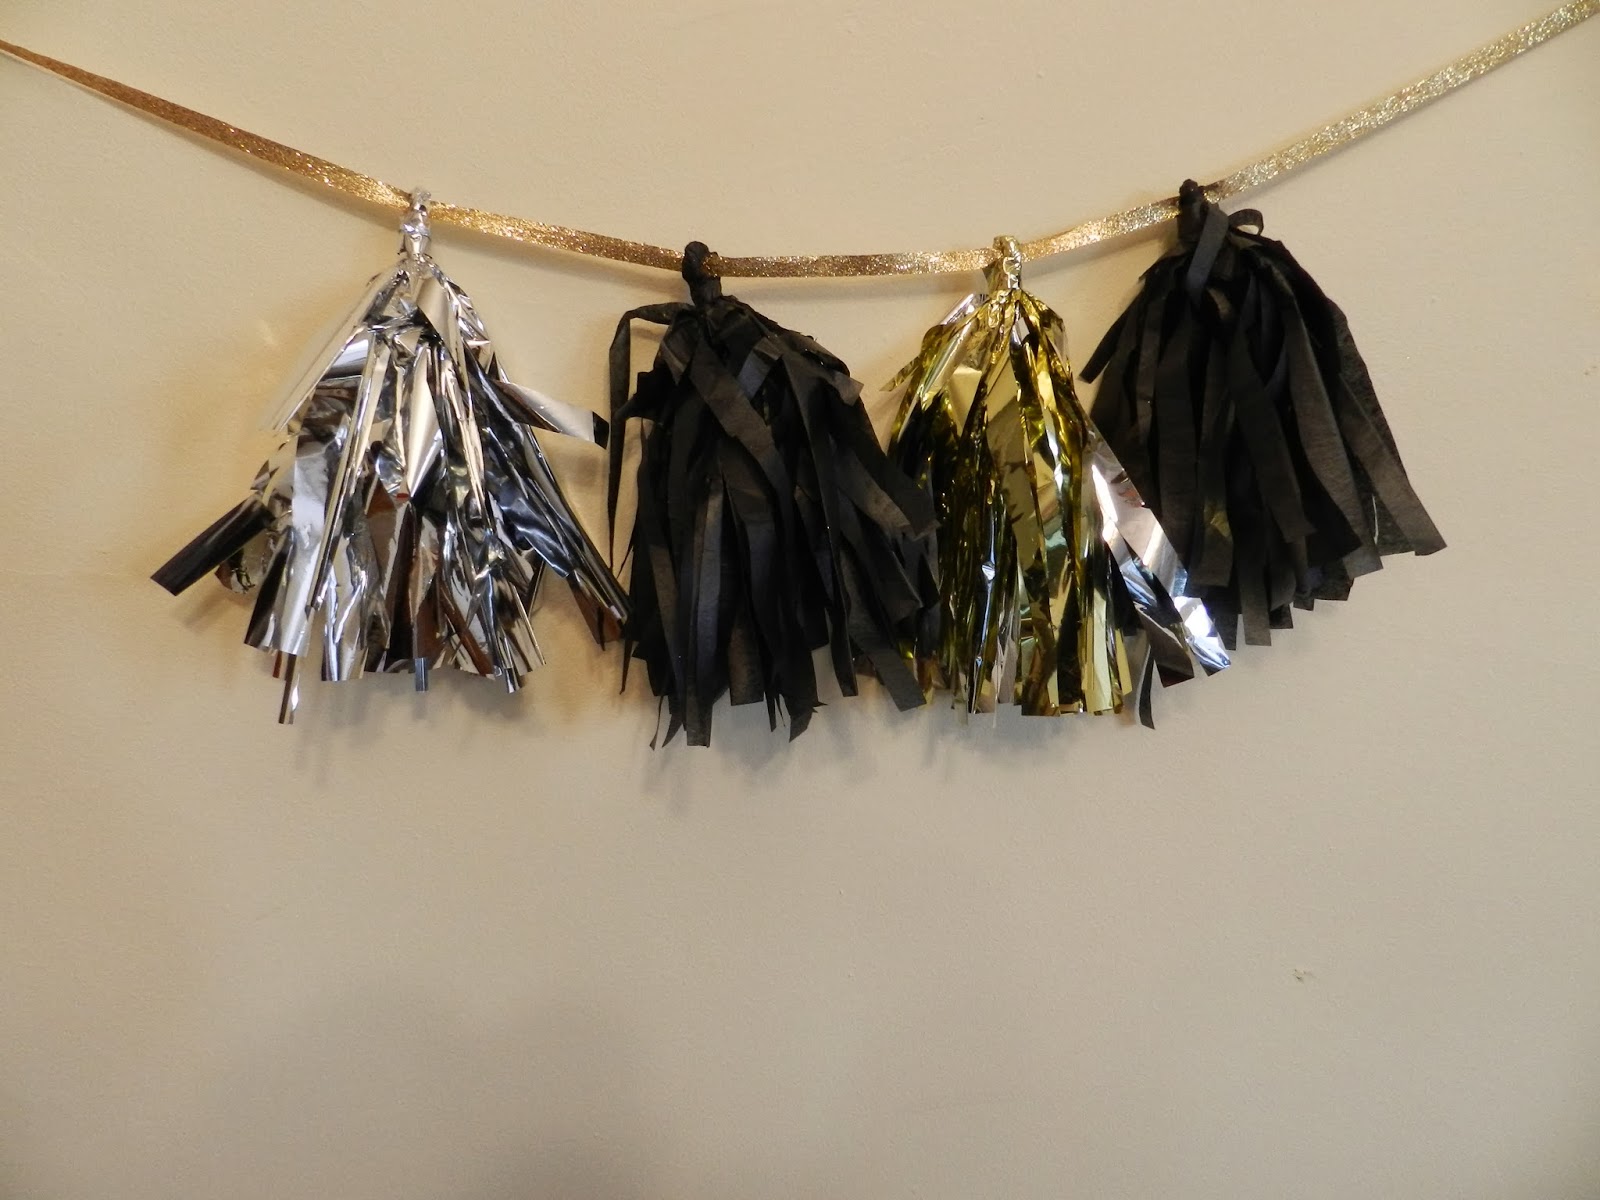
Turn Your Tissue Into A Tassel

Sunday, January 26, 2014

For years now, I’ve been seeing tissue paper tassels on blogs. I thought to myself – “Cute! Those are so easy to make.”


Then, I saw people selling them.

Let’s have a little intervention here. Don’t buy them! Unless you need an absurd amount, they are SO EASY to make.

I bought a few supplies during my major craft weekend just to show you all how easy these are to pull off. I also referenced this tutorial from TomKat Studio – just to make sure I wasn’t missing anything.


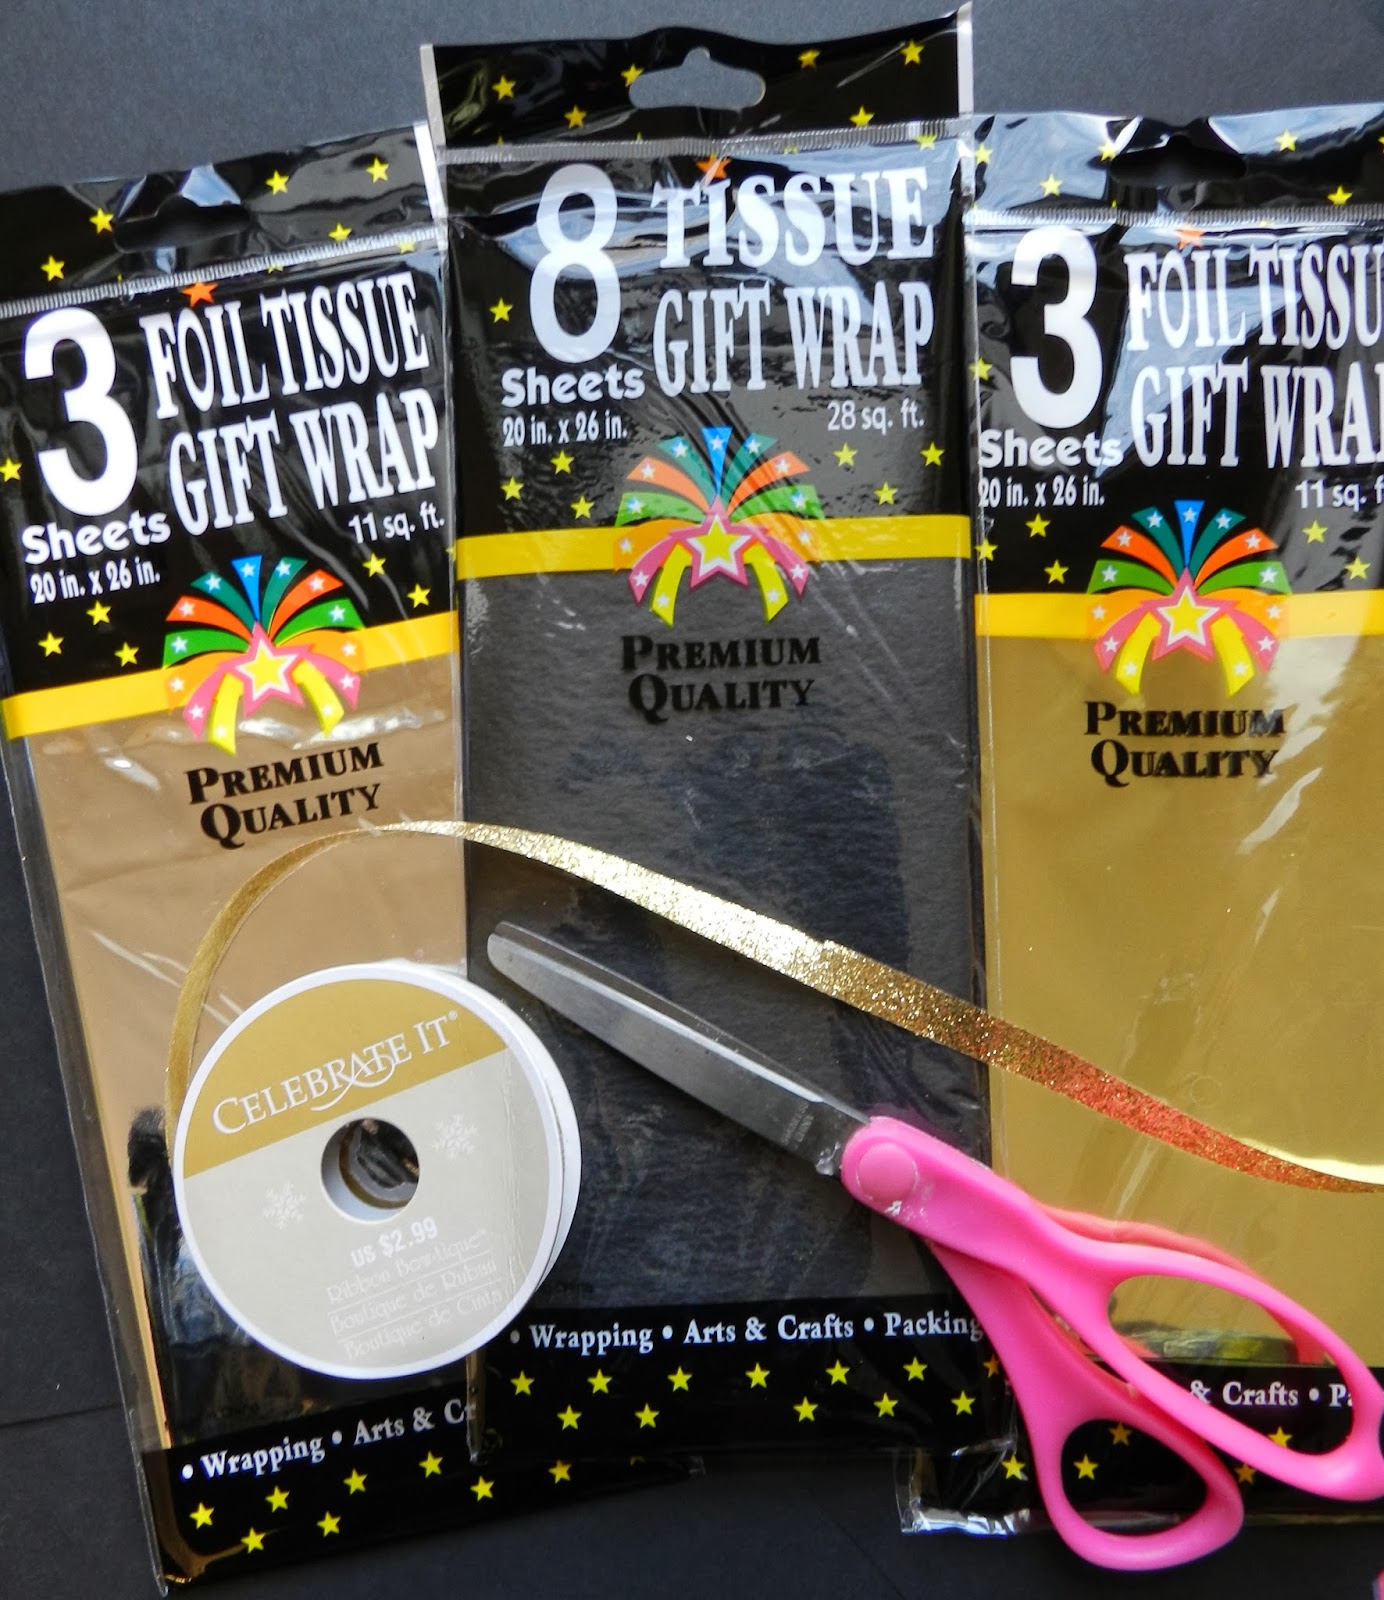
Step 1 – Buy Supplies. For my small illustration, I just bought a few pieces of tissue. I used 1 sheet for each tassel. JUST ONE SHEET! This is all that it takes!


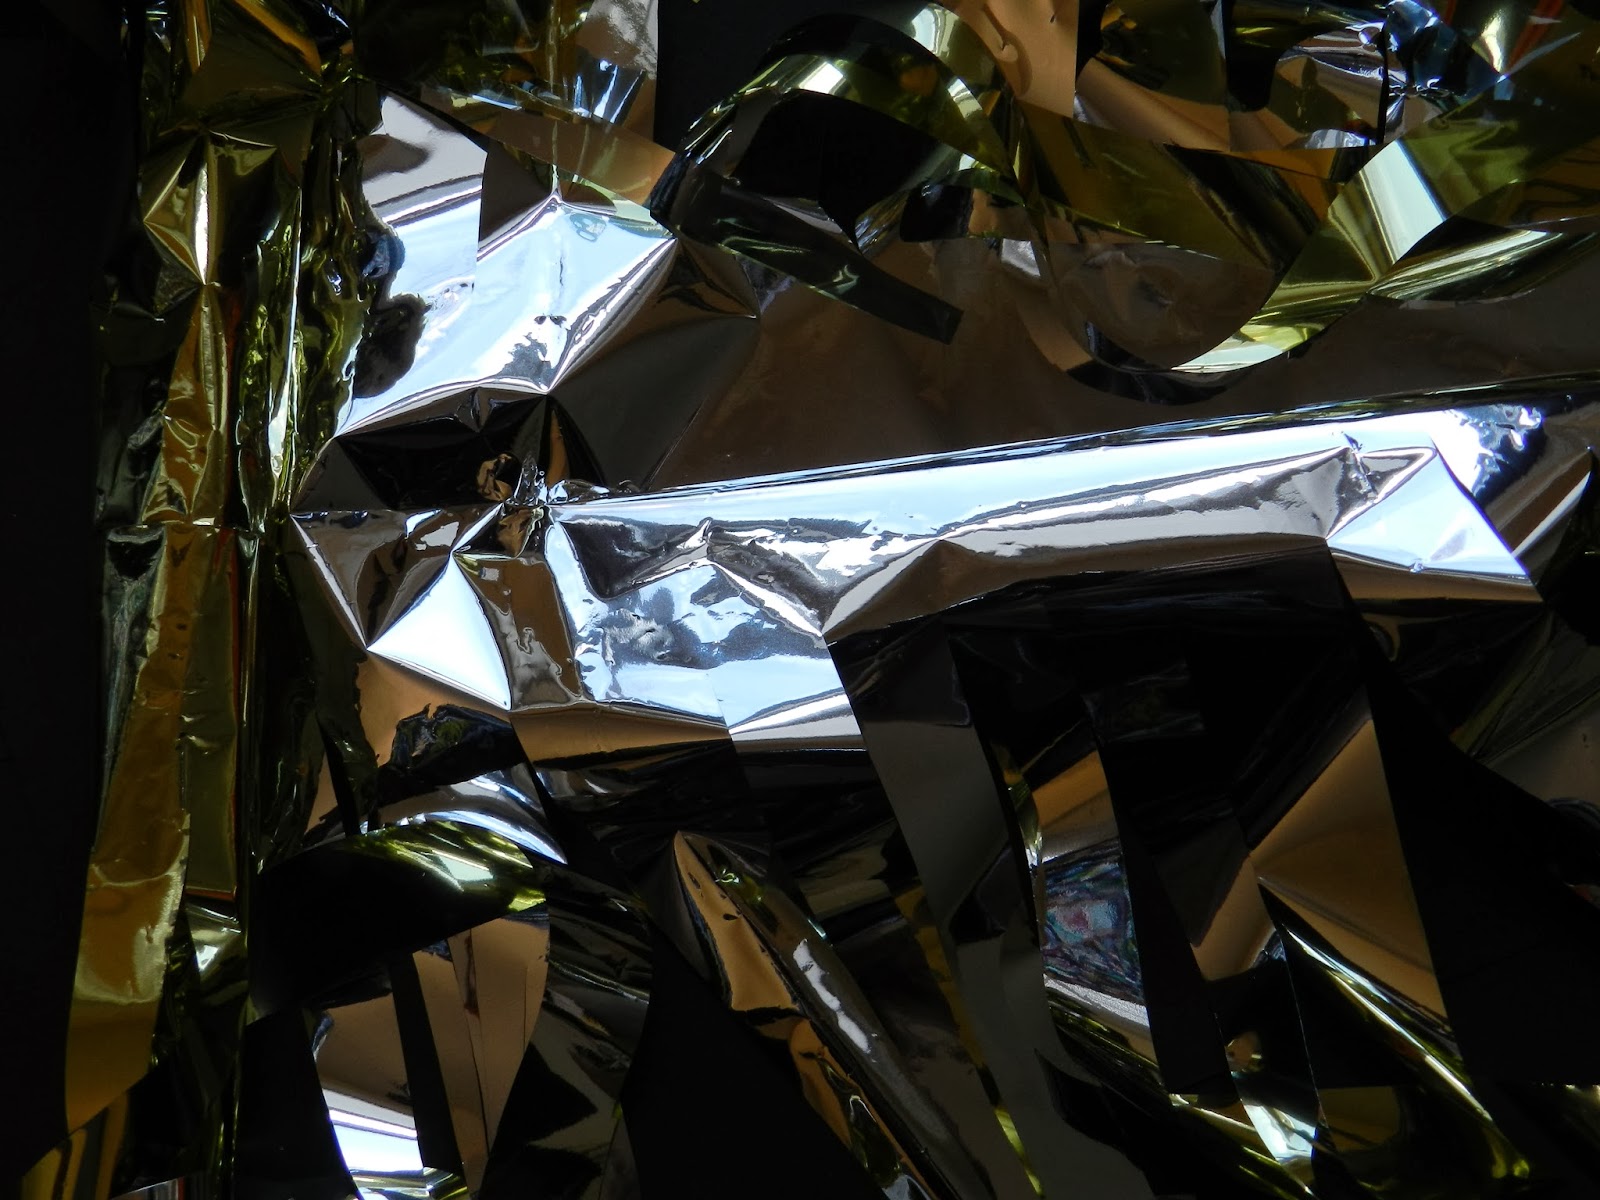
Step 2 – Fold & Cut! Fold the paper in half and cut lines about an inch away from the fold.


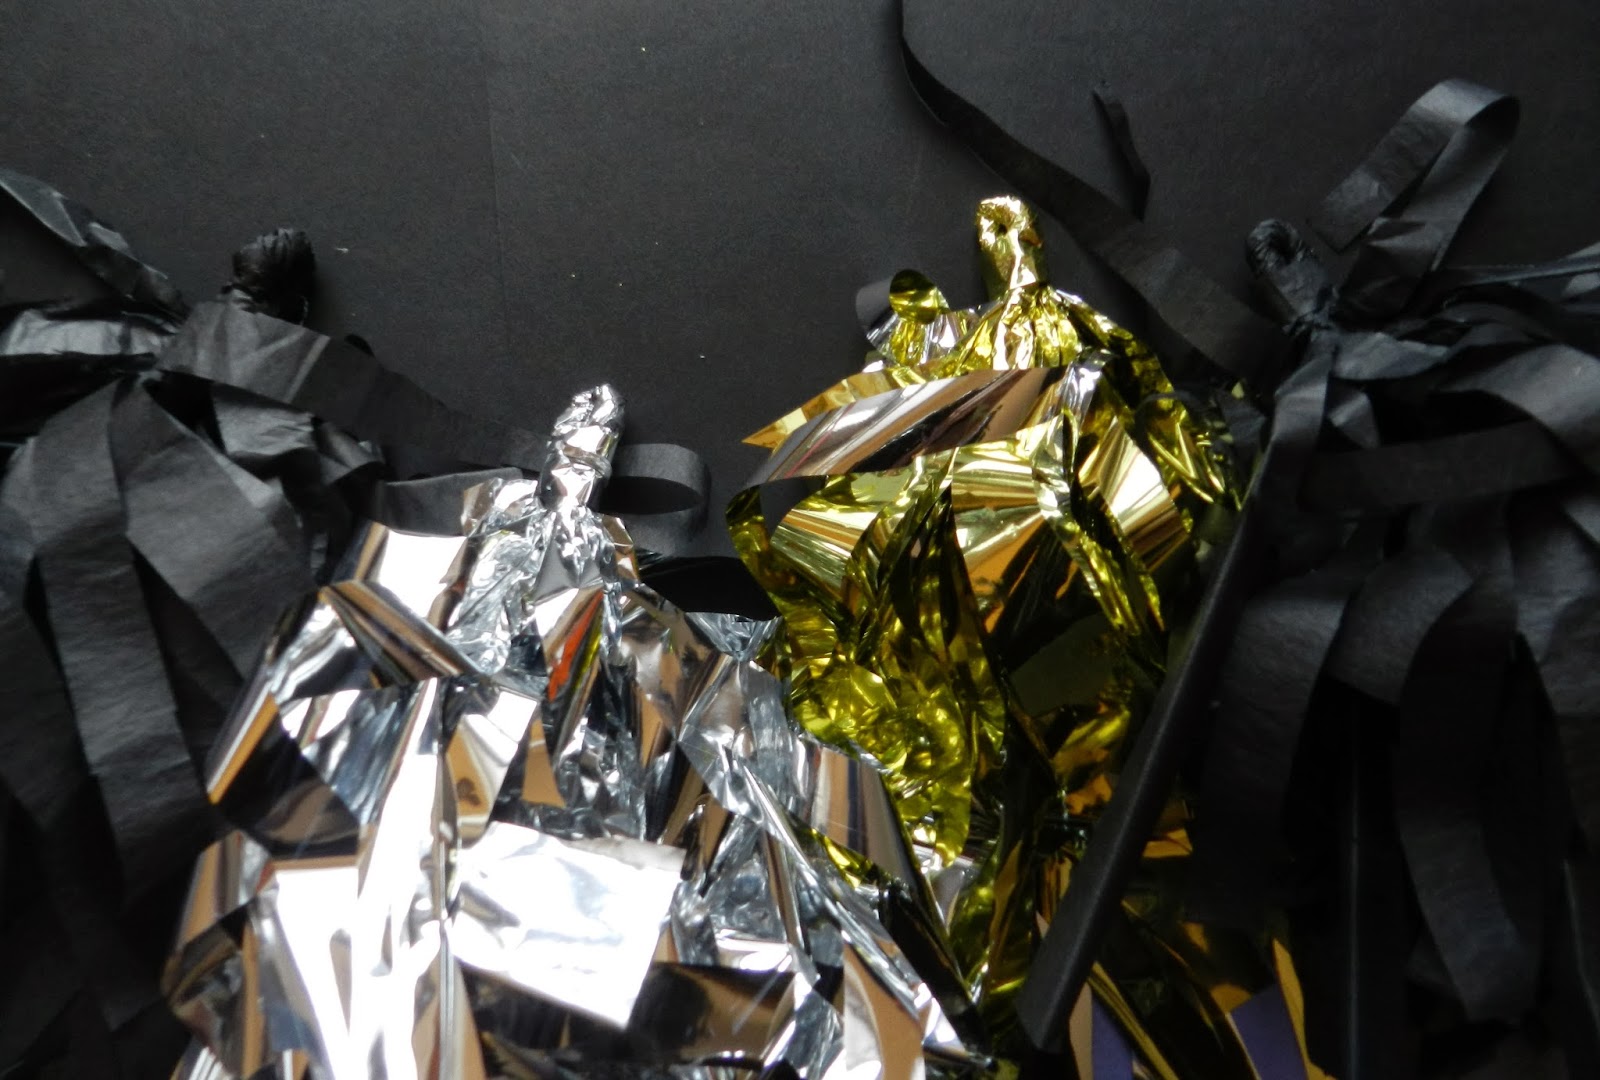
Step 3 – Open & Twist/Roll! Open the folded metallic and roll down the middle like so. Warning – the metallic is rather fragile and rips easily! (sorry this photo sucks. The metallic is hard to photography with my poopy camera!). 


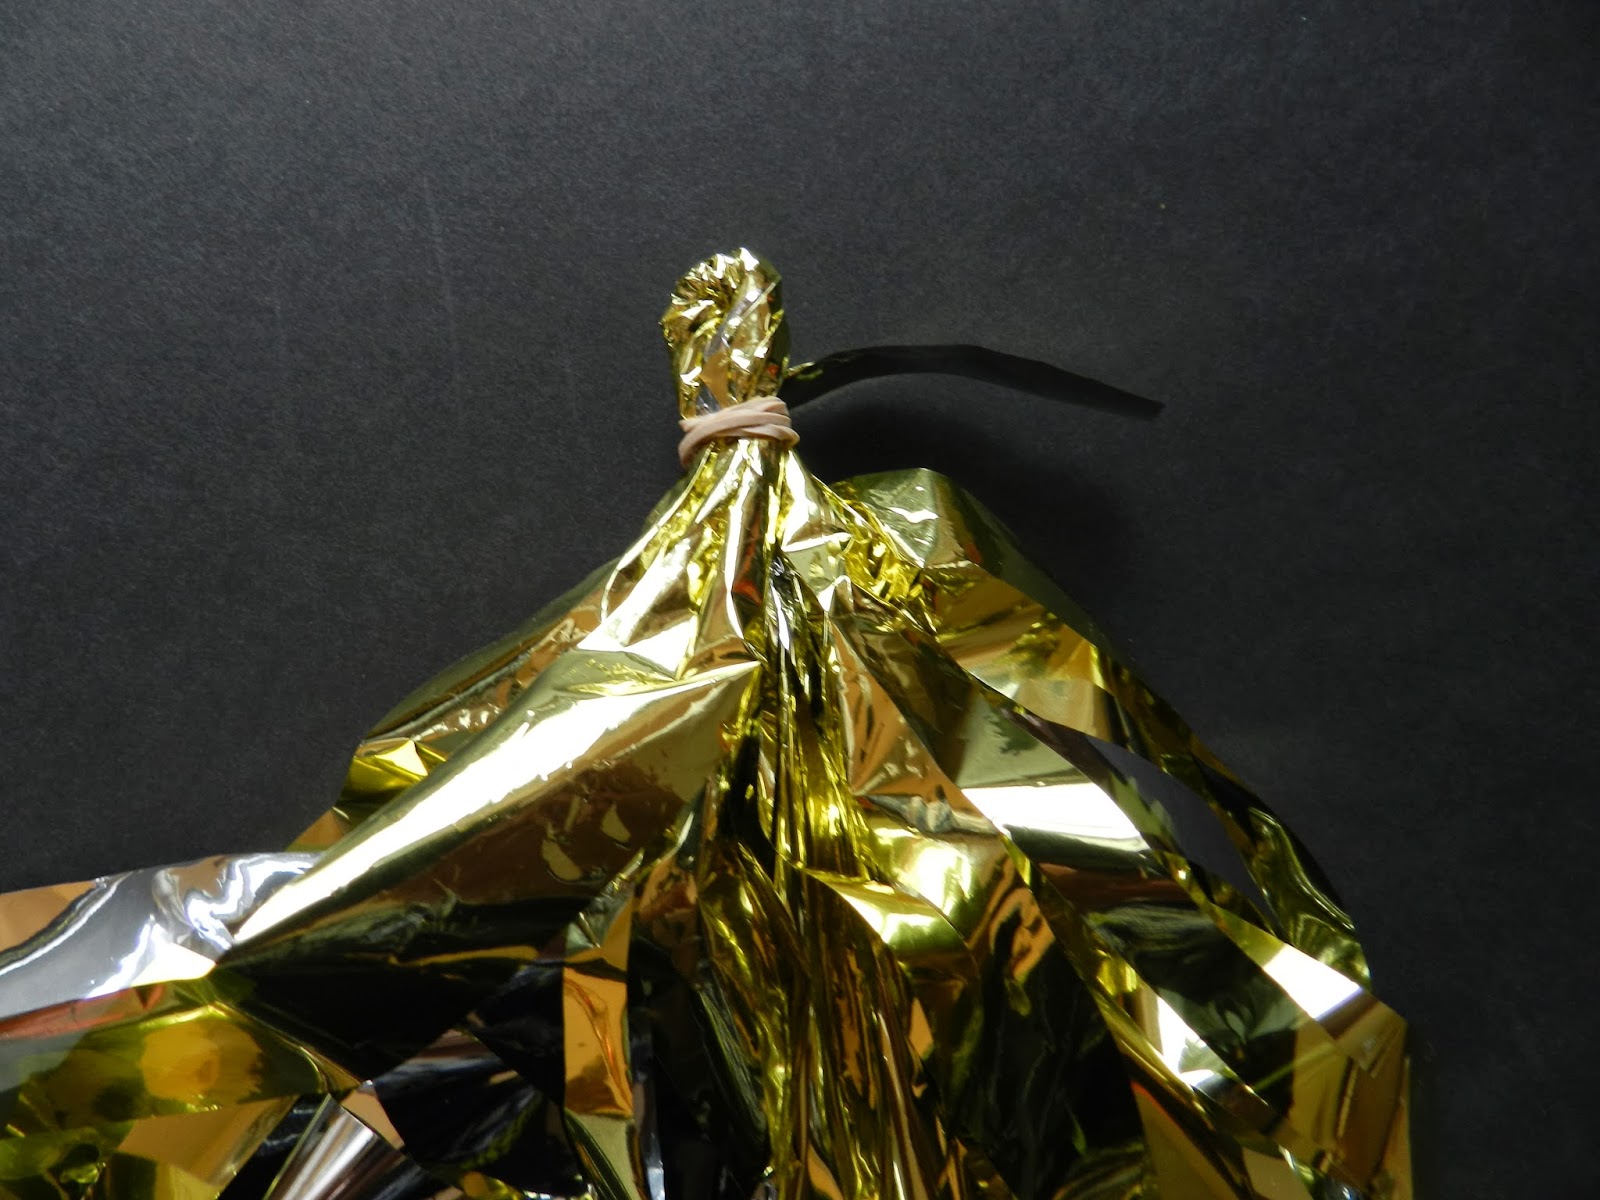
Step 4 – Make a loop. Once you’ve hit the end, twist and make a loop like so. My paper wasn’t holding itself in loop form, so I used a rubber band and then hit it with some metallic. Think like you are using your hair to cover up a pony tail holder lol.  


Repeat!

Step 5 – String ribbon through the holes.


Step 6 – Hang!

 I only made 4 to illustrate how easy this was. It took about 15 minutes.

If I were to do this for real, I would consider investing in some longer tissue paper. I have 10 sheets of tissue paper left and spent $5 on the paper (I had the ribbon at home, but I think that was $1 too).


So before you buy these online, consider making them! 
Read More

Alice in tumblr-land

Tuesday, January 21, 2014

On this Tech Tuesday, I just MUST feature this book I purchased last weekend.

Brady and I were at our favorite card store, Kards Unlimited, and after he checked out he said, “You’ve seen that Alice in tumblr-land book before, right?” No. I had not.


So I went over to the counter and one minute after I picked up the “Alice in tumblr-land, and Other Fairy tales for a New Generation” book, I purchased it. The best $20 I’ve spent in a long time!

Being a “Social Media Strategist” (or even if I wasn’t), this book makes me LOL. It’s a modern day spin on classic fairytale stories. For example, the ugly duckling didn’t feel so ugly after she got Instagram and found a filter that makes her look awesome.


The book is written by Tim Manley – the author behind the blog Fairy Tales for Twenty-Somethings.


Perhaps a good gift for the next book baby shower or for a social media-savvy friend!  
Read More

No Drink-uary Update

Monday, January 20, 2014

No Drink-uary is more than half way over. So I thought I’d do a little check in. You know, just in case anyone decided to join me on this sober journey.

On Friday, January 10th, I caved in. B and I went to Franktuary. There weren’t any seats in the restaurant due to some big parties/groups, SO they seated us…at the bar. The temptation was too strong, so we both gave in and ordered a drink. ONLY ONE! Forgive me god. I had the Church Wine.


Sorry my photo skills suck. I saw that light reflection, but didn't want to be that nerd bomber that took another pic. 


My pre-determined cheat day was for our day trip to Morgantown on Saturday, January 11th. I imbibed with some beers (and a shot of fireball). It was cheat day, right?

Some West Virginia Beer! 


I haven’t drank since then. Unless you count the drunken gingerbread cupcake that my mom gave on Saturday. I felt like my breath smelled like liquor after that!

This week we are going to see Jay-Z. I may cheat again, but we’ll see how it goes. Even though I love rap music, this will actually be my first rap concert! I couldn’t be more excited. Tom Ford is currently my favorite song (I don’t pop Molly, I rock Tom Ford) and my ringtone in college was Big Pimpin. 
Read More

DIY BYOB Bag

Sunday, January 19, 2014

One of my unofficial resolutions for a while now has been to create my own content for Shot of Brandi*.

Featuring other bloggers/websites content has always been a bit scary for me. While I always site my source and the photos, I always have a fear that someone will reach out and be upset that I featured their content. To be honest, that’s why I didn’t blog as much last year.

This weekend I went to the craft store…alone. Usually I stick a craft trip in while Brady is waiting in the car in between running errands, but this time I went alone. It was glorious.

For under $45 I bought several craft projects that I can’t wait to feature on here. And $6 of that $45 was spent on a mini-crafting iron. It’s the most adorable thing!

First up was my last project of the day – a wine tote. Now one of my supplies wasn't in that $45 and I must say that I was very skeptical of this, but it turned out to be my favorite item of the day.


A few weeks ago at Michael’s, I purchased this Glitter Iron on Paper for $8. It was originally $16, but I had a 50% off coupon.  The wine tote was $1 from Pat Catans (local Pittsburgh craft store).

For the pattern, I just Googled “Wine Bottle and Glass” and voila!


Now, here’s the tricky part. With iron on paper, you typically need to print things backwards. That’s why I tried the bottle/glass combo first – it doesn’t matter if it’s backwards. BUT with this stuff, you iron over it. So you don’t need to print backwards.

Basically, you iron your item for 20-25 seconds. Then, you put the non-glitter side of the paper down on your item. You leave the clear film on the top of the glitter. Then, you put down a cloth or towel over your cut outs and then press down on the iron for 20-25 seconds. Then, you flip your item over and iron down for another 20-25 seconds. I ended up using my real iron once I discovered it wouldn't touch the glitter because it got hotter than the mini one. 

Once your item is dry, you peel off the clear film and BAM! You’re a craft genius!


So in the end, I made this for like $2 because I still have a full role of paper. 

Disclaimer: This iron on paper is apparently for some fancy machine that cuts out shapes. But I just printed some stencils and cut out my own stuff. I feel a little guilty, but I would totally skip the machine.


I have another larger tote and wine bag, so I’ll be sure to share what I make with those goodies! 
Read More